Transaction Extension
Working with Transaction Extension in XtendM3
Table of contents
Description
Transaction extension is a type of extension where one could create a custom M3 API (MI) Transaction. These custom transactions will behave identically to standard M3 transactions i.e. they have input/output parameters in the same structure as standard APIs and they can be executed through both ION API and M3 Metadata Publisher.
Use cases
- Reading input and writing output data
- Retrieving or changing transaction parameters
- Writing error messages and skipping transactions
- Building and setting data containers
Step by step implementation
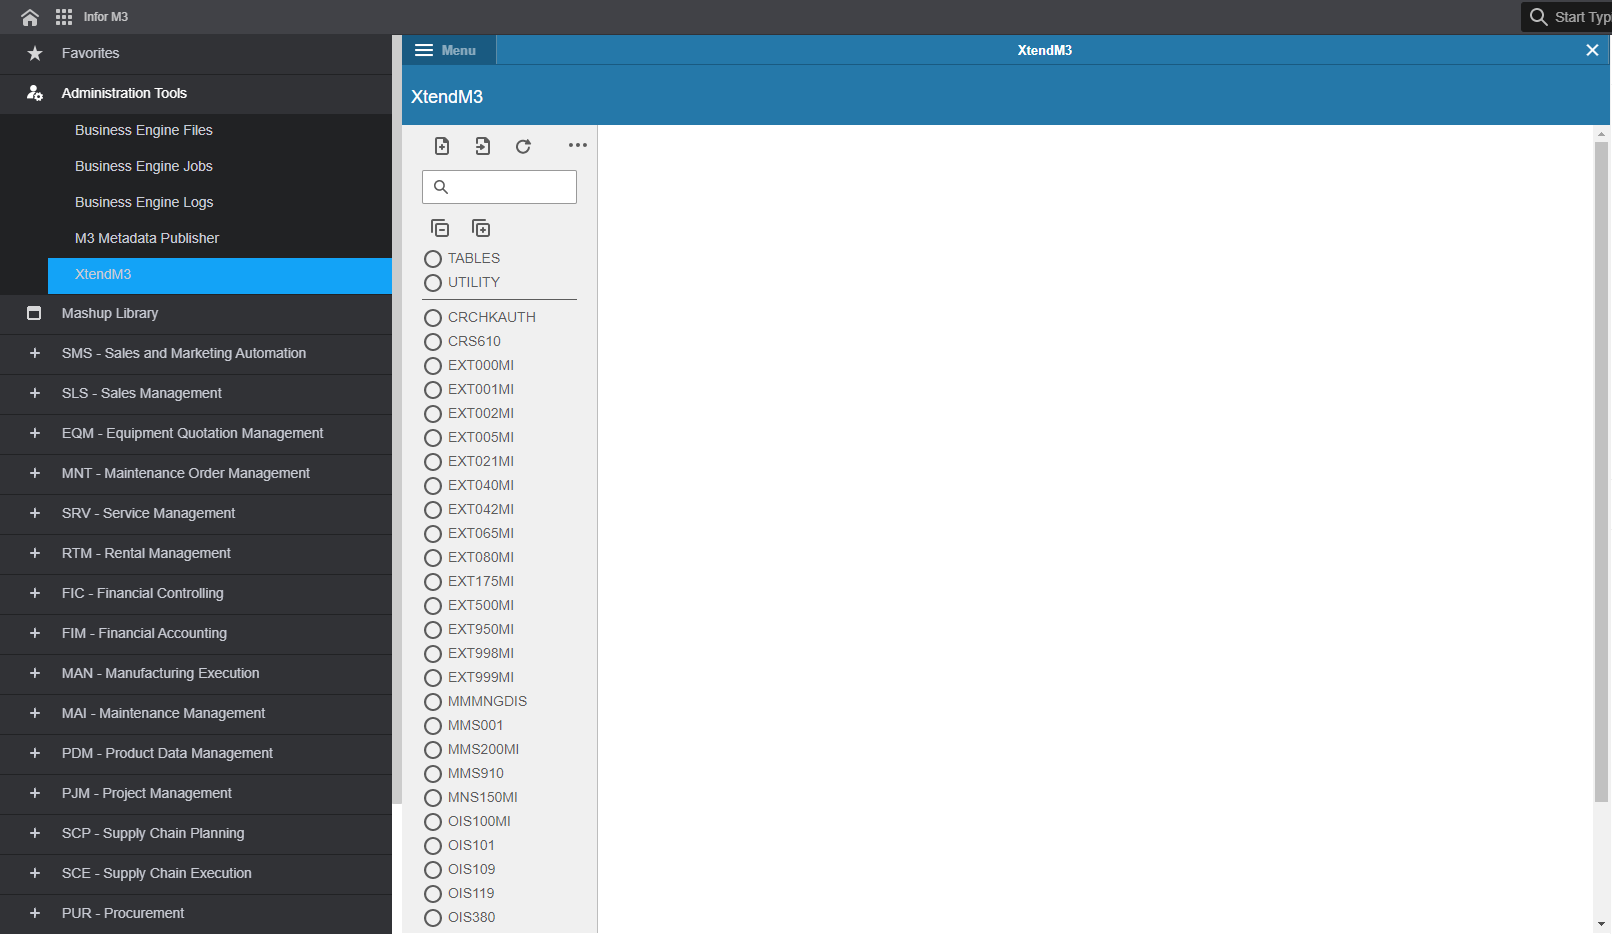
1. Open XtendM3 tool
After opening M3 main page, select Menu on the top left corner. Then select XtendM3 from Administration Tools folder.
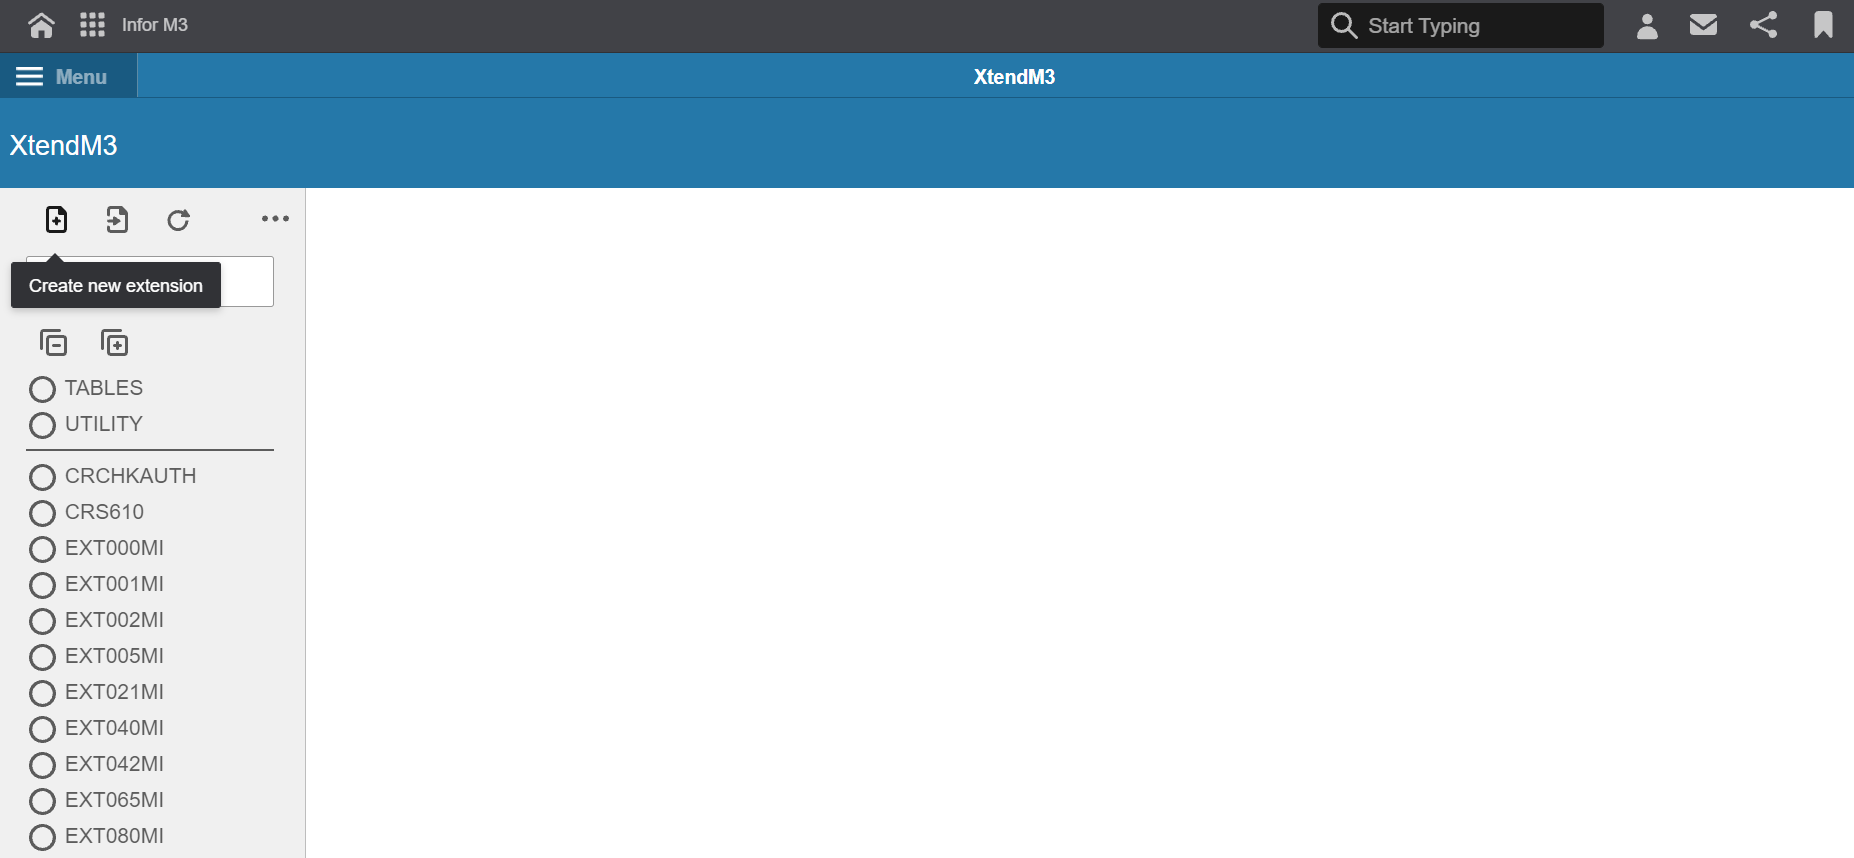
2. Create new extension button
To create a new extension select “Create a new extension” button.
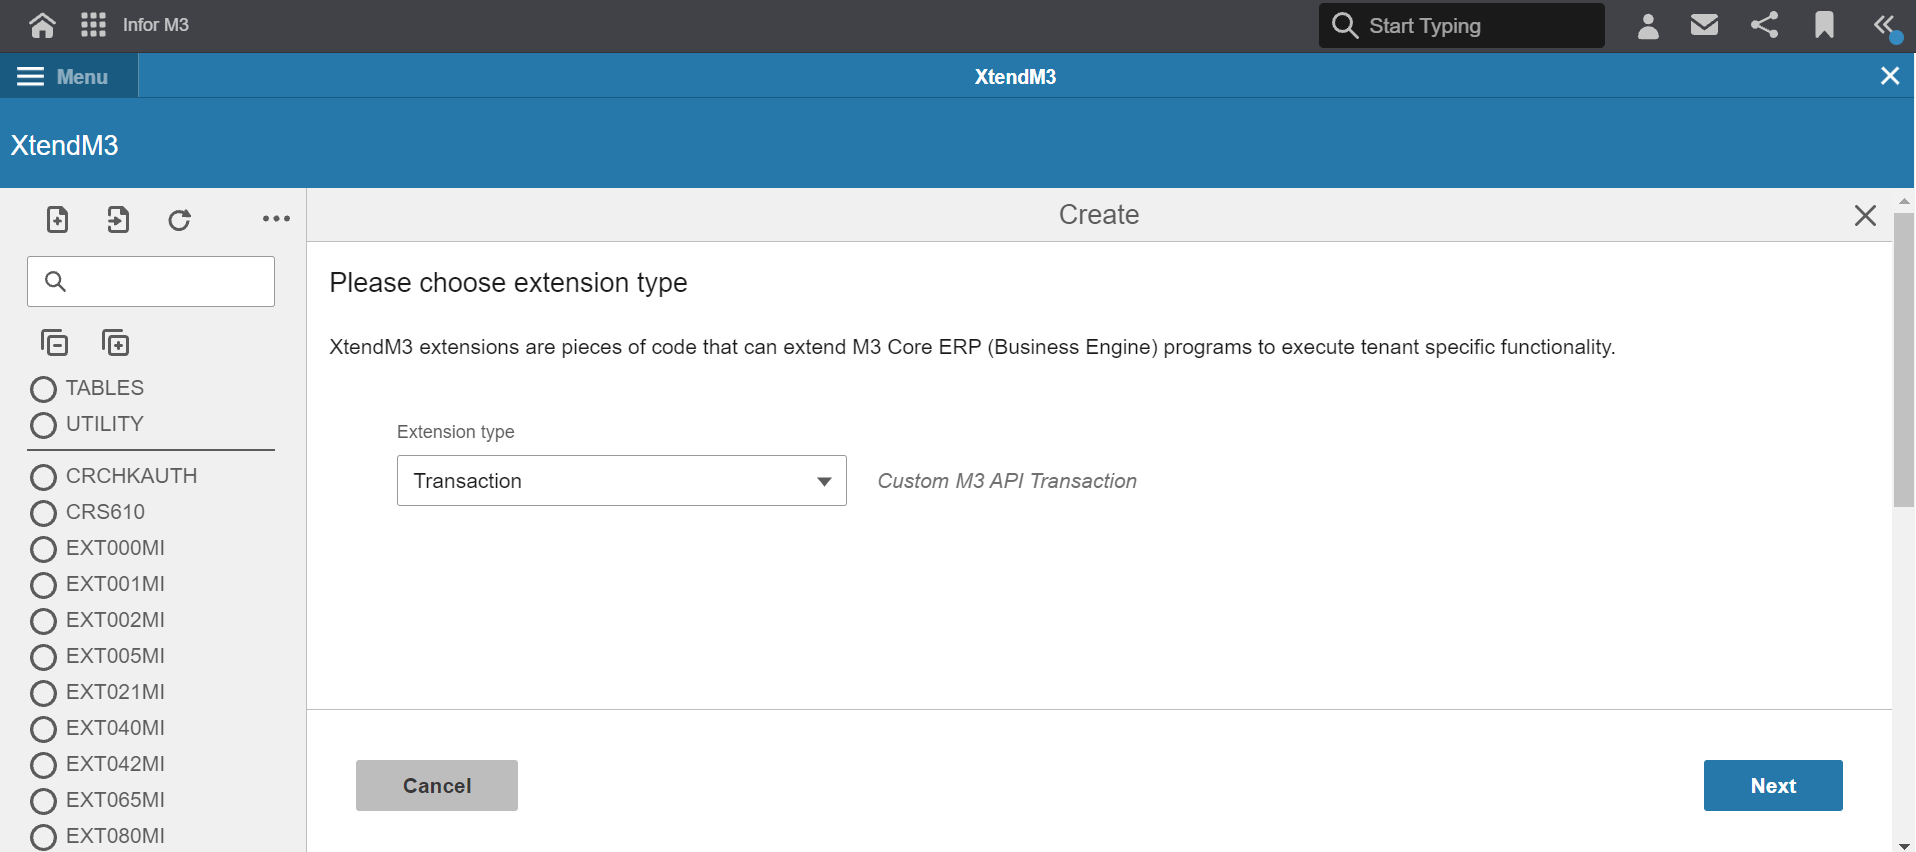
3. Extension Type as a Transaction extension
Opened window displays an option to select the type of extension to be designed. Select “Transaction” and then click “Next”.
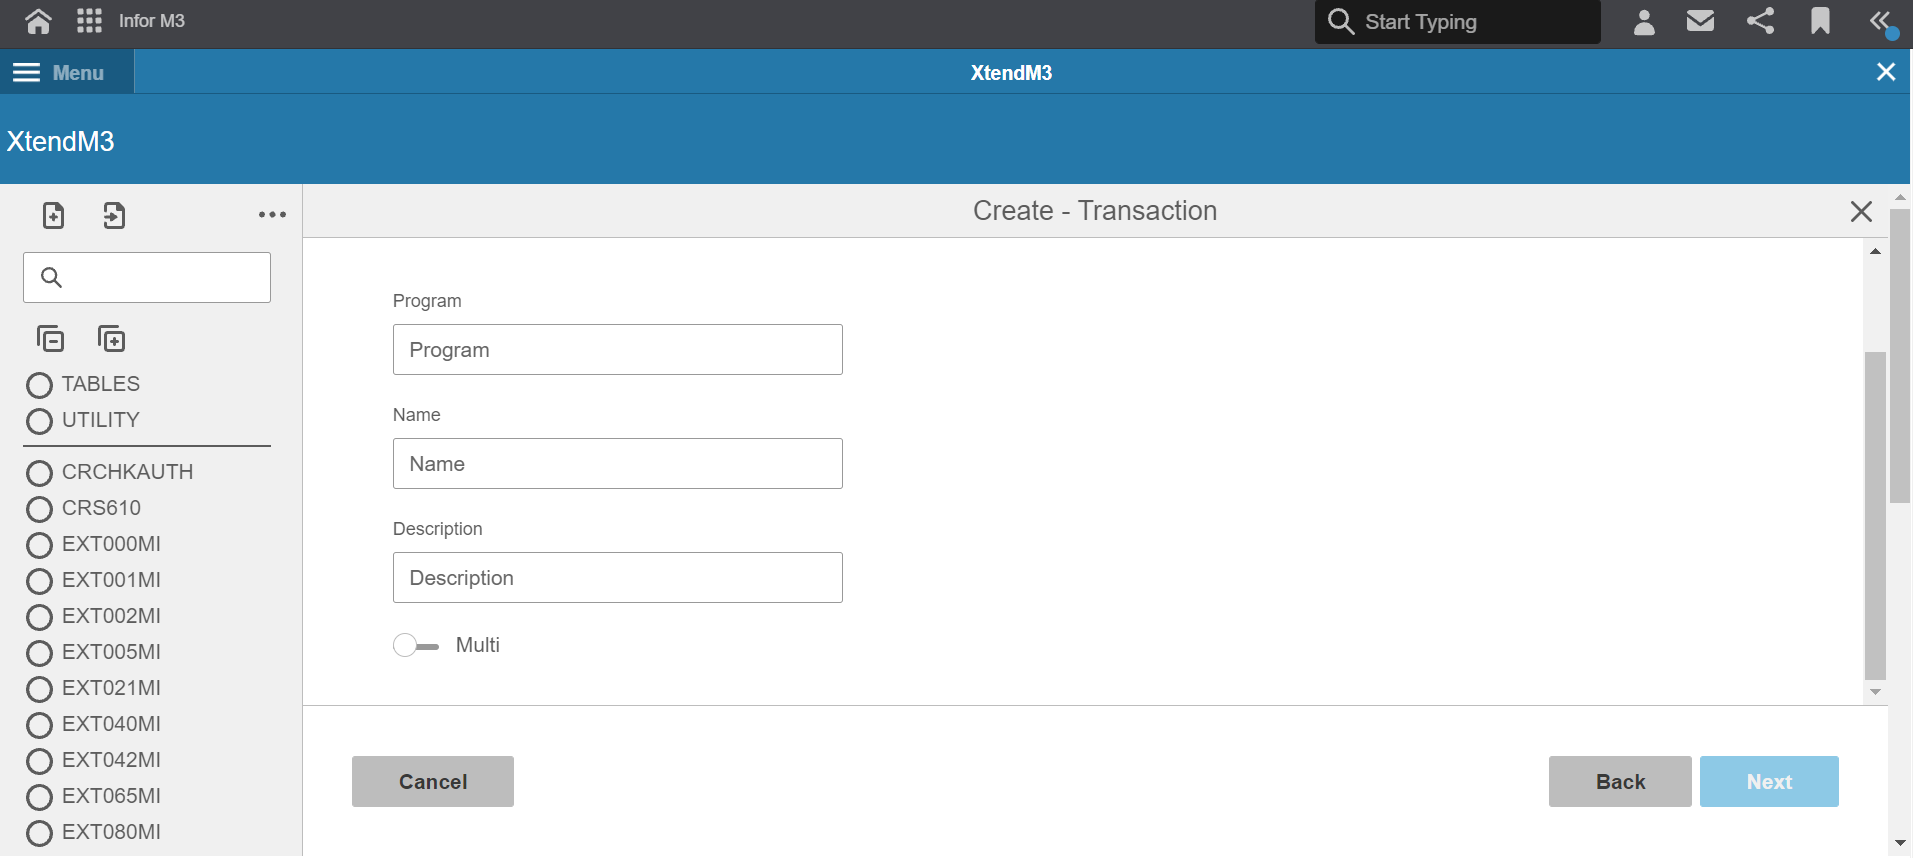
4. Complete all inputs and single/ multi option
Fill in extension information as described:
- Program : Name of an existing or new program where the extension will be created
- Name: Name of the extension
- Description: Functionality of the extension
- Multi (option): Multi option allows to return multiple records to the user. Otherwise will return a single record. Multi can be used to list APIs.
Then click “Next”.
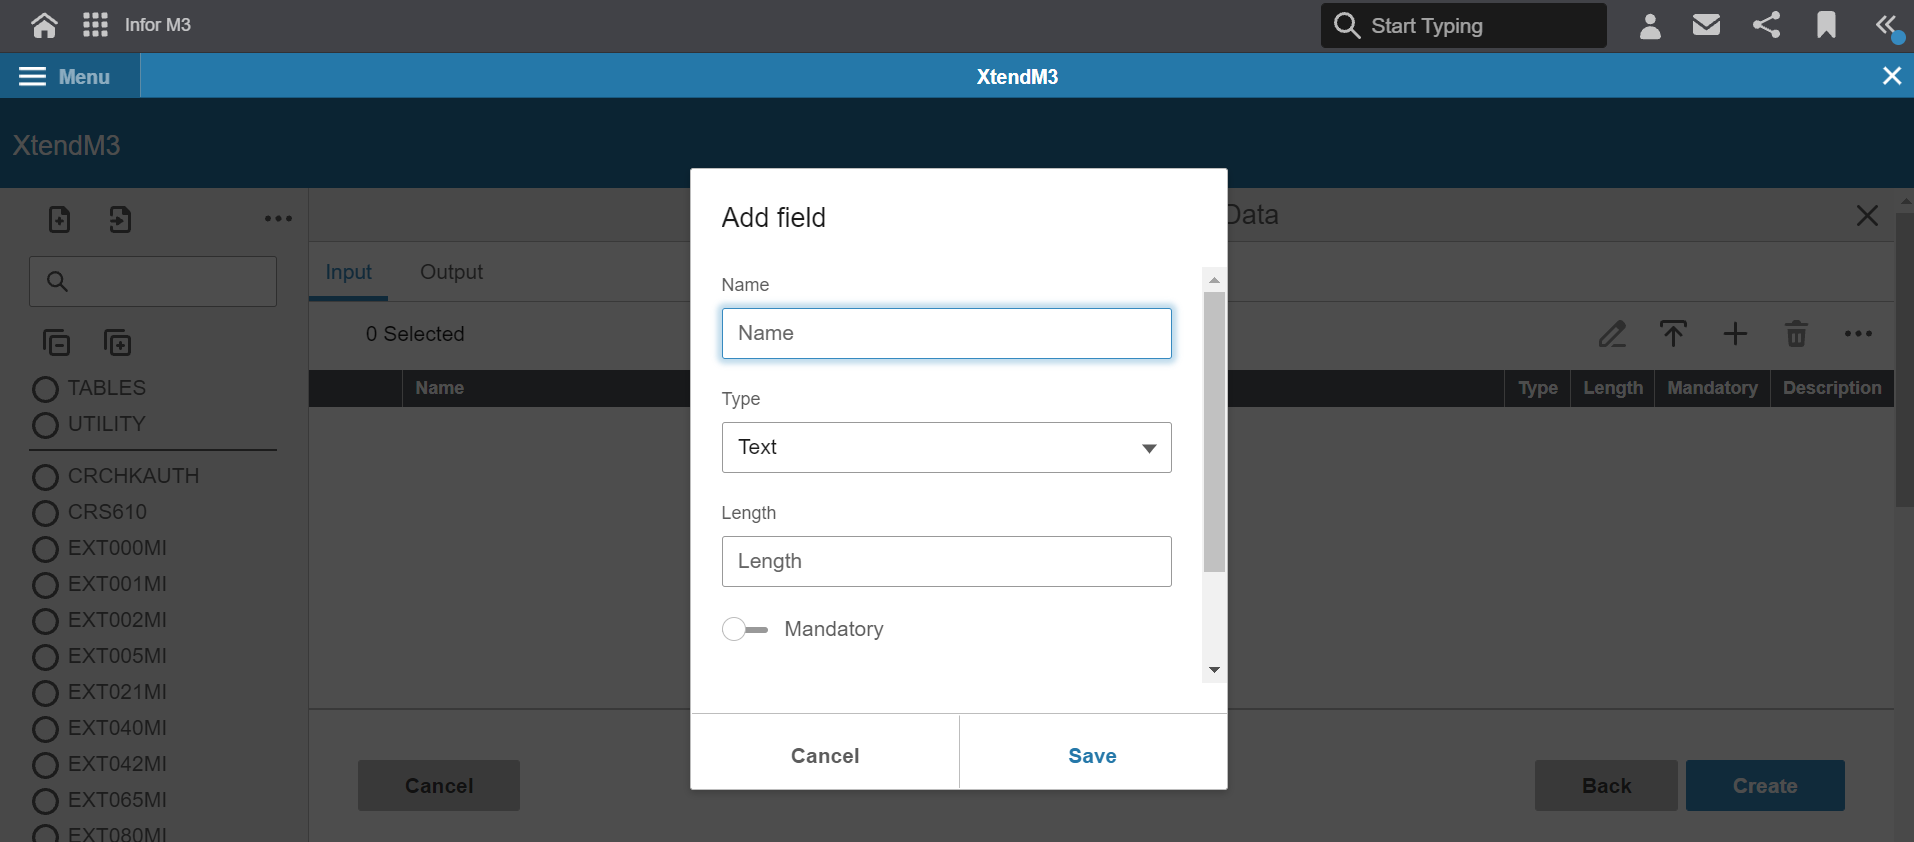
5. Add input and/ or output field
At this point you can create fields with input or output data by clicking a plus button and filling in the information:
- Name: 4 uppercase character name of the field
- Type: text/ number (select “number” for inserting date field)
- Lenght: maximum input lenght
- Mandatory (option): choose if the input will be mandatory (only for input fields)
- Description: more detailed description of the field
Click “Save” to finish.

6. Skeleton of the extension
Created extension will contain default code template.
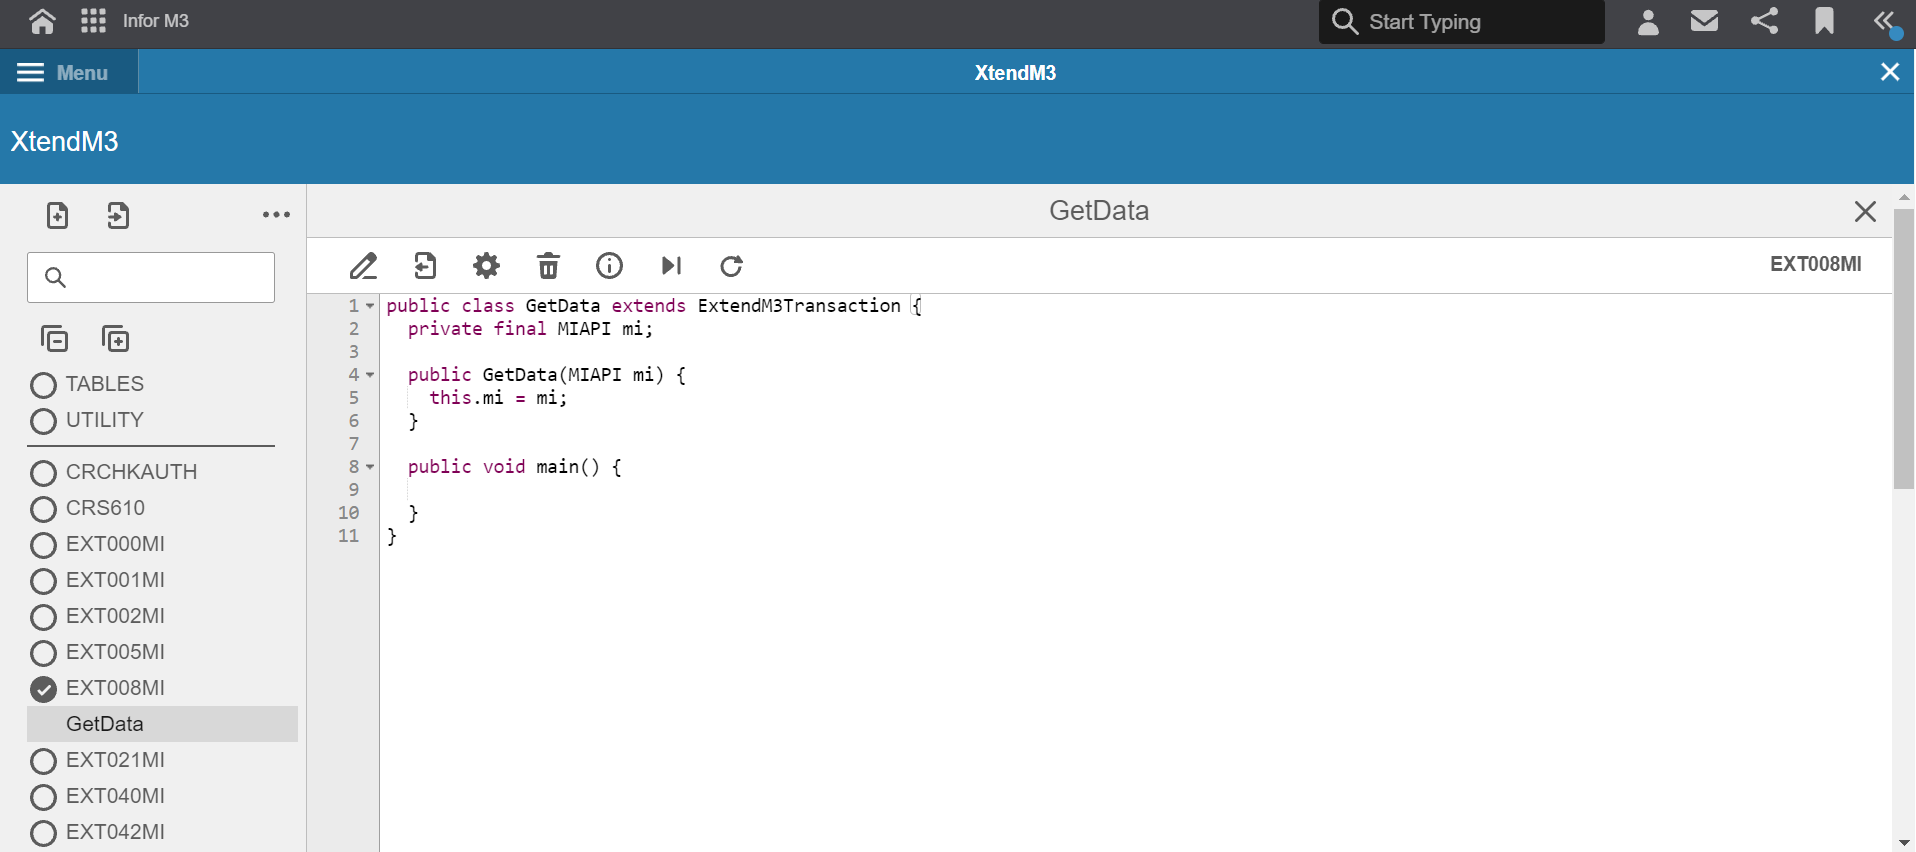
Over the code field there are several tools with which you can operate on the designed extension.

Listing them from the left side they are used to:
- Enable editing mode
- Export the code
- Extra settings to change the parameters of the extension or enable it etc.
- Delete the extension
- Information about the extension
- Test compile
- Refresh
7. Code example of transaction extension and APIs usage
To start writting extension code enable editing by clicking “Edit” button.
Example below shows usage of MI API and Program APIto display UserID.
To read more documentation on API specification click on the link.
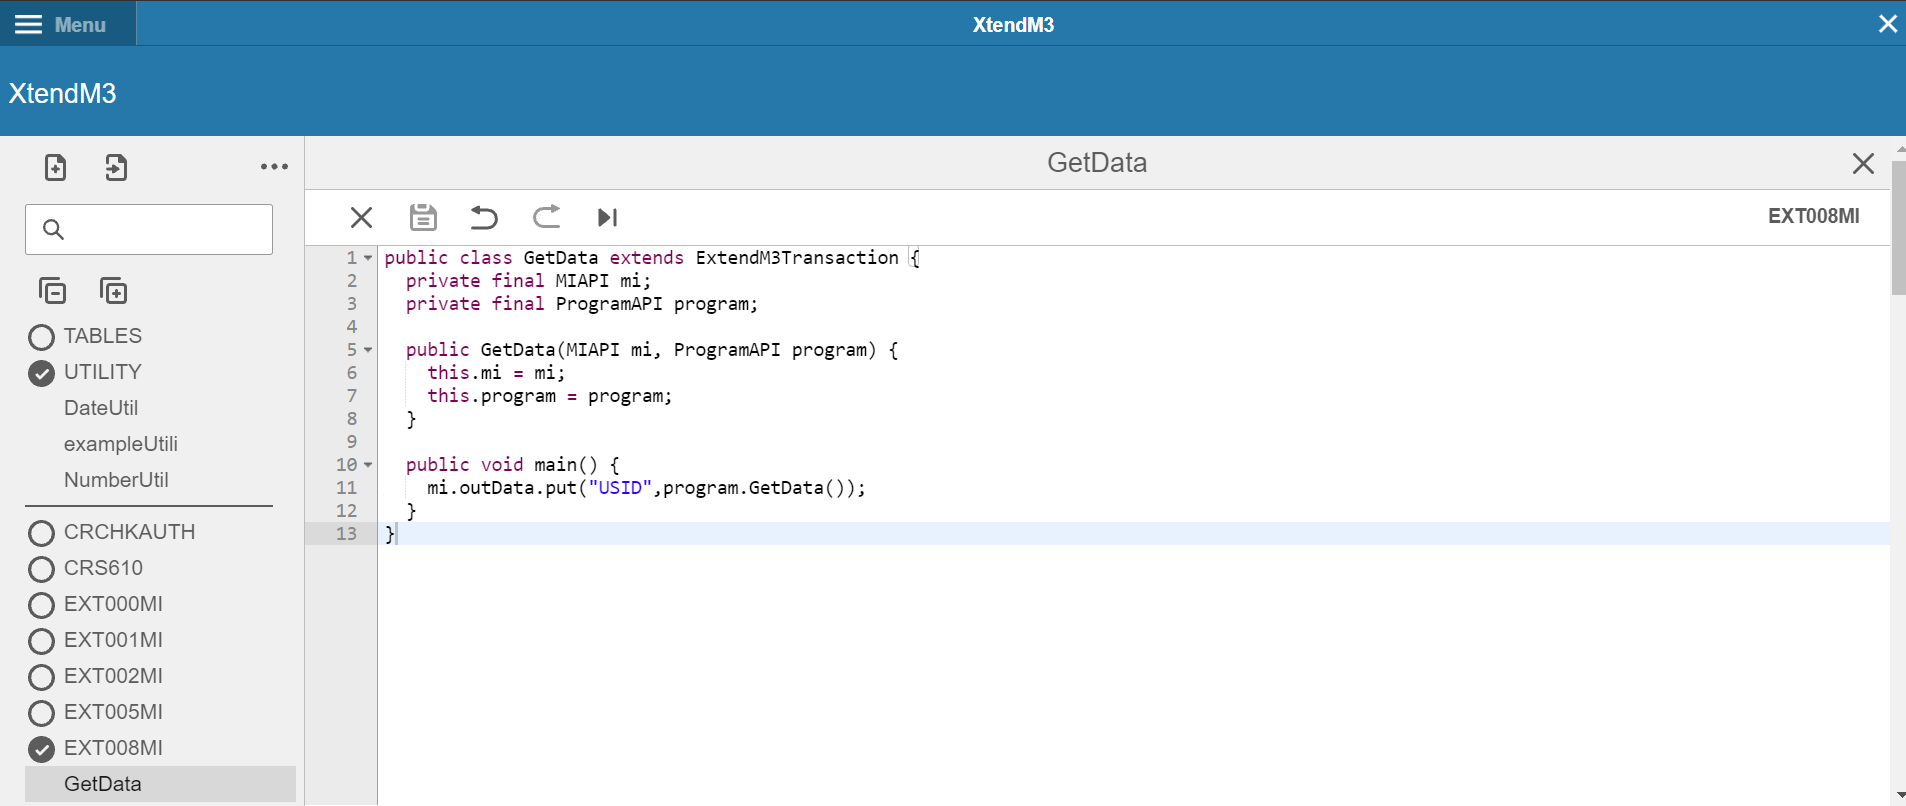
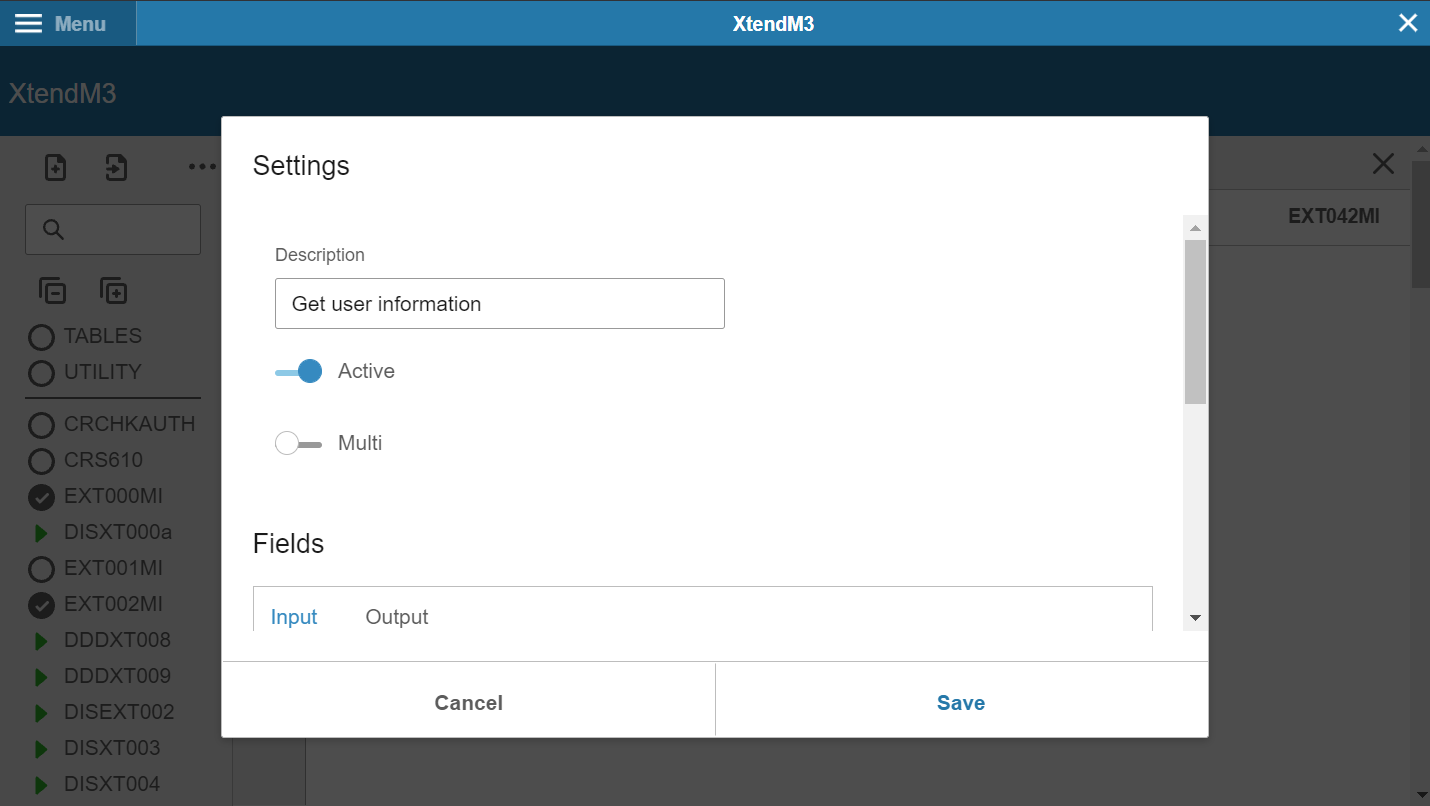
To finish save written extension by clicking “Save” button. It is necesary to activate the extension from settings as shown below for it to be exectuted.
Important notes
- Always test the examples for your own solution before using them in production
- Do not use transaction API in Transaction extensions
- It is a good practice to use a test compilation of the program before running
- Data presented in the examples is random
Exported Extension
See Also
More examples
API documentation