Developing a Widget
by Andreas Hallberg on November 25, 2020
There are already a couple of different guides on how to get started with the Widget SDK, such as the Developers Guide and the README. Those should be the most up-to-date resources on the topic. However, for this month’s blog post I thought I’d give a more practical introduction and go through the steps of downloading the SDK, and developing a very basic widget.
Note that the following should be considered an example of how I do things rather than a list of steps that you must follow. With that said, let’s begin.
Prerequisites
First, I’ll prepare my machine by installing the necessary software, as described in the README.
Node.js
I work on many different projects, some of which require a specific version of Node. To make switching between versions easier, I use nvm. Right now I’ll use the latest LTS version of Node:
$ nvm use --lts
Now using node v14.15.0 (npm v6.14.8)
Visual Studio Code
VSCode is my editor of choice for the moment, and it is the one recommended (but not required!) for widget developers. It is fast, configurable, and it has language support for pretty much every programming language and framework I’m working with.
Git
Git is a fundamental part of my development workflow, whether I’m collaborating with others on shared repositories, or if I am working on personal projects offline. If nothing else, it is just nice to always be able to keep track of changes and easily revert them.
Preparing the SDK
First, I’m going to download the .zip for the latest SDK release from the releases page. At the time I’m writing this, the latest version is 3.2.0-rc.1. Once the .zip has been downloaded, I extract it to a directory where I usually store code i.e ~/code/Infor_HomepagesWidgetSDK.
Adding Git
Next, I’ll initiate Git:
$ cd ~/code/Infor_HomepagesWidgetSDK
$ git init
Initialized empty Git repository in ~/code/Infor_HomepagesWidgetSDK/.git/
I create a .gitignore file with the following:
node_modules
.DS_Store
Samples/Builds
Samples/Widgets/**/*.js
Samples/Widgets/**/*.js.map
!Samples/Widgets/scripts/**
This will make sure that I don’t track the changes in build artifacts, but I still track files included in the SDK. One could also skip the last line and ignore the Samples/Widgets/scripts directory since we will probably never make changes there. But since that directory is included with the SDK, I like to keep it in order to see changes when I update the SDK in the future.
Finally, I’ll stage and commit everything:
$ git add .
$ git commit -m "initial commit"
Installing Node dependencies
I go into the Samples/ directory and run:
$ npm install
This will install the packages necessary for building the widgets and running a development server.
Preparing the editor
I open the Widgets directory (Infor_HomepagesWidgetSDK/Samples/Widgets) in VSCode:
code ./Widgets
I get a popup telling me to install the recommended extensions:
- Angular.ng-template - The Angular Language Service
- ms-vscode.vscode-typescript-tslint-plugin - TSLint
- msjsdiag.debugger-for-chrome - Chrome Debugger
The SDK is prepared with some VSCode tasks that helps with building and running the dev server. I start them with Cmd+Shift+B (Ctrl+Shift+B on Windows). There are no errors in the Terminal, so everything appears to be working: 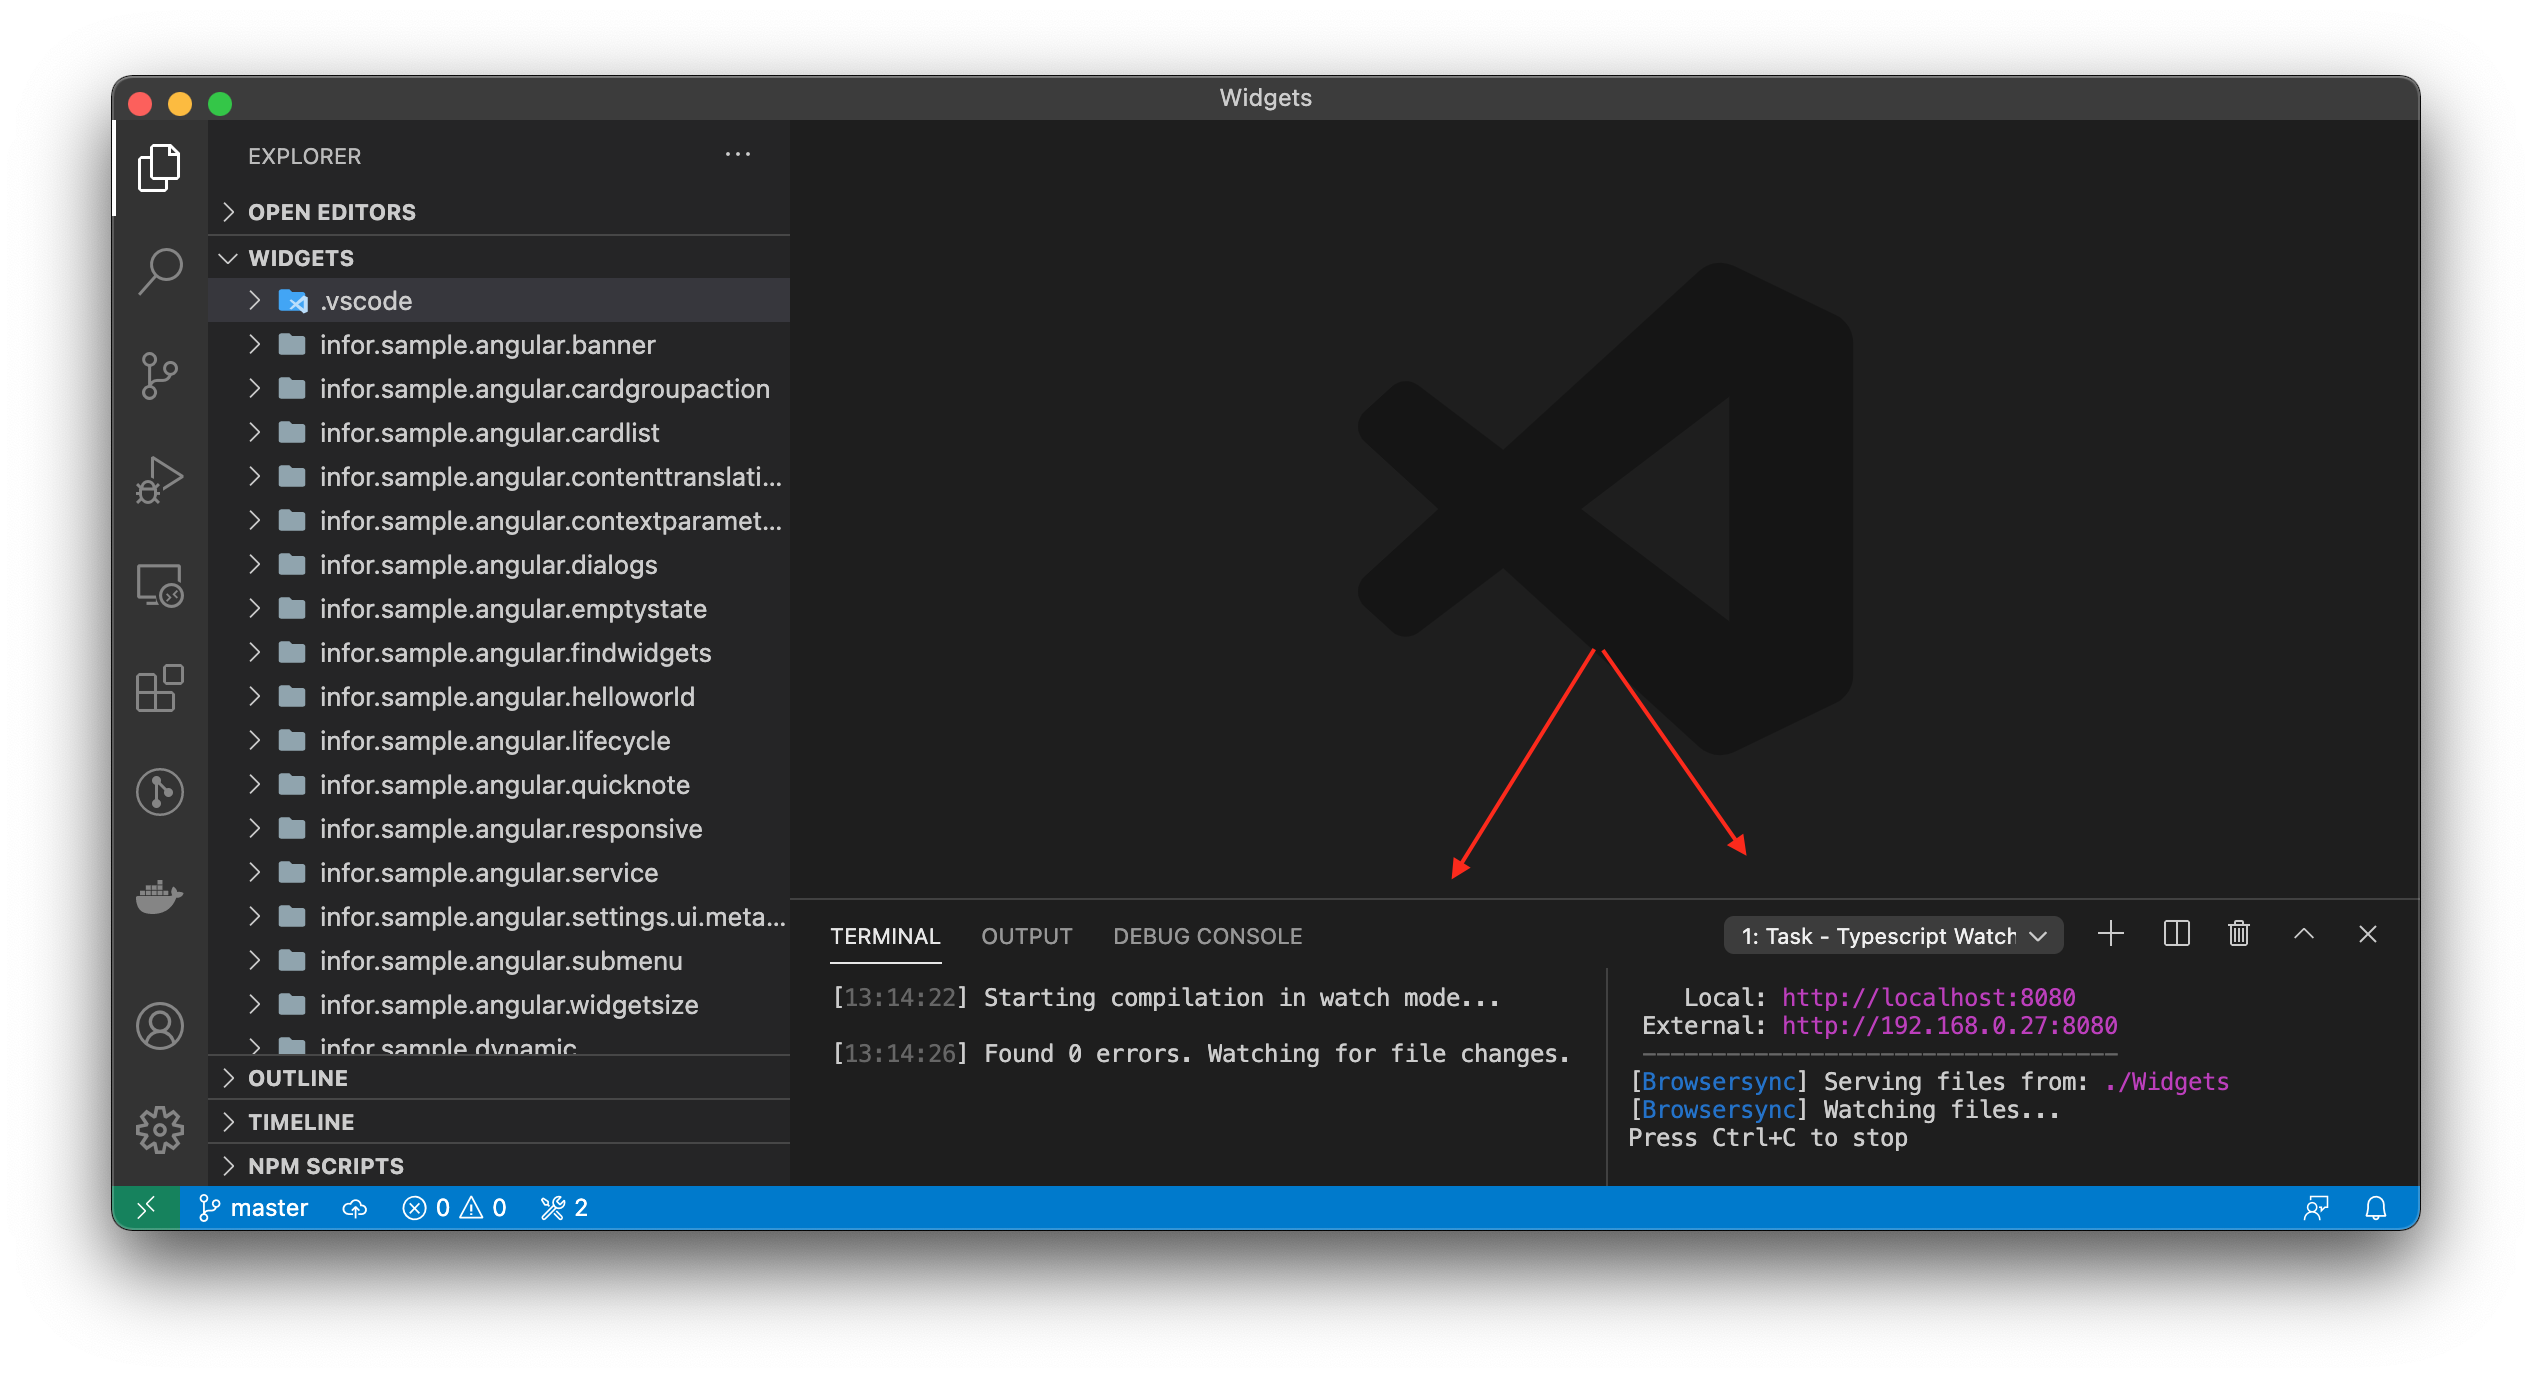 .
.
Coding
Now all the preparations are done, we are ready for some coding.
I create 4 files in a new directory:
sample.todo/
    widget.manifest
    widget.ts
    todo.module.ts
    todo.component.ts
Here, I am structuring my files according to the Angular Styleguide - Rule of One, where each component, module, service, class etc. is located in its own file. This style is not enforced for widget developers, but I think that it’s an easy way to keep things neat.
I populate the files with the following:
todo.component.ts:
import { Component } from "@angular/core";

@Component({
    template: `
        <p>TodoComponent works!</p>
    `,
})
export class TodoComponent {
}
todo.module.ts:
import { NgModule } from "@angular/core";
import { TodoComponent } from "./todo.component";

@NgModule({
    declarations: [
        TodoComponent,
    ],
})
export class TodoModule { }
widget.manifest:
{
    "widgetId": "sample.todo",
    "version": "1.0",
    "type": "inline",
    "framework": "angular",
    "name": "Todo",
    "title": "Todo",
    "description": "A todo list"
}
widget.ts:
import { IWidgetContext, IWidgetInstance } from "lime";
import { TodoComponent } from "./todo.component";
import { TodoModule } from "./todo.module";

export const widgetFactory = (context: IWidgetContext): IWidgetInstance => {
    return {
        angularConfig: {
            moduleType: TodoModule,
            componentType: TodoComponent,
        },
    };
};
See if it works
Now, my widget should be ready for a first test. The development server and compiler is already running, and since neither of them report any errors I should be able to see my widget if I start the debugger. I start it up using F5, and… 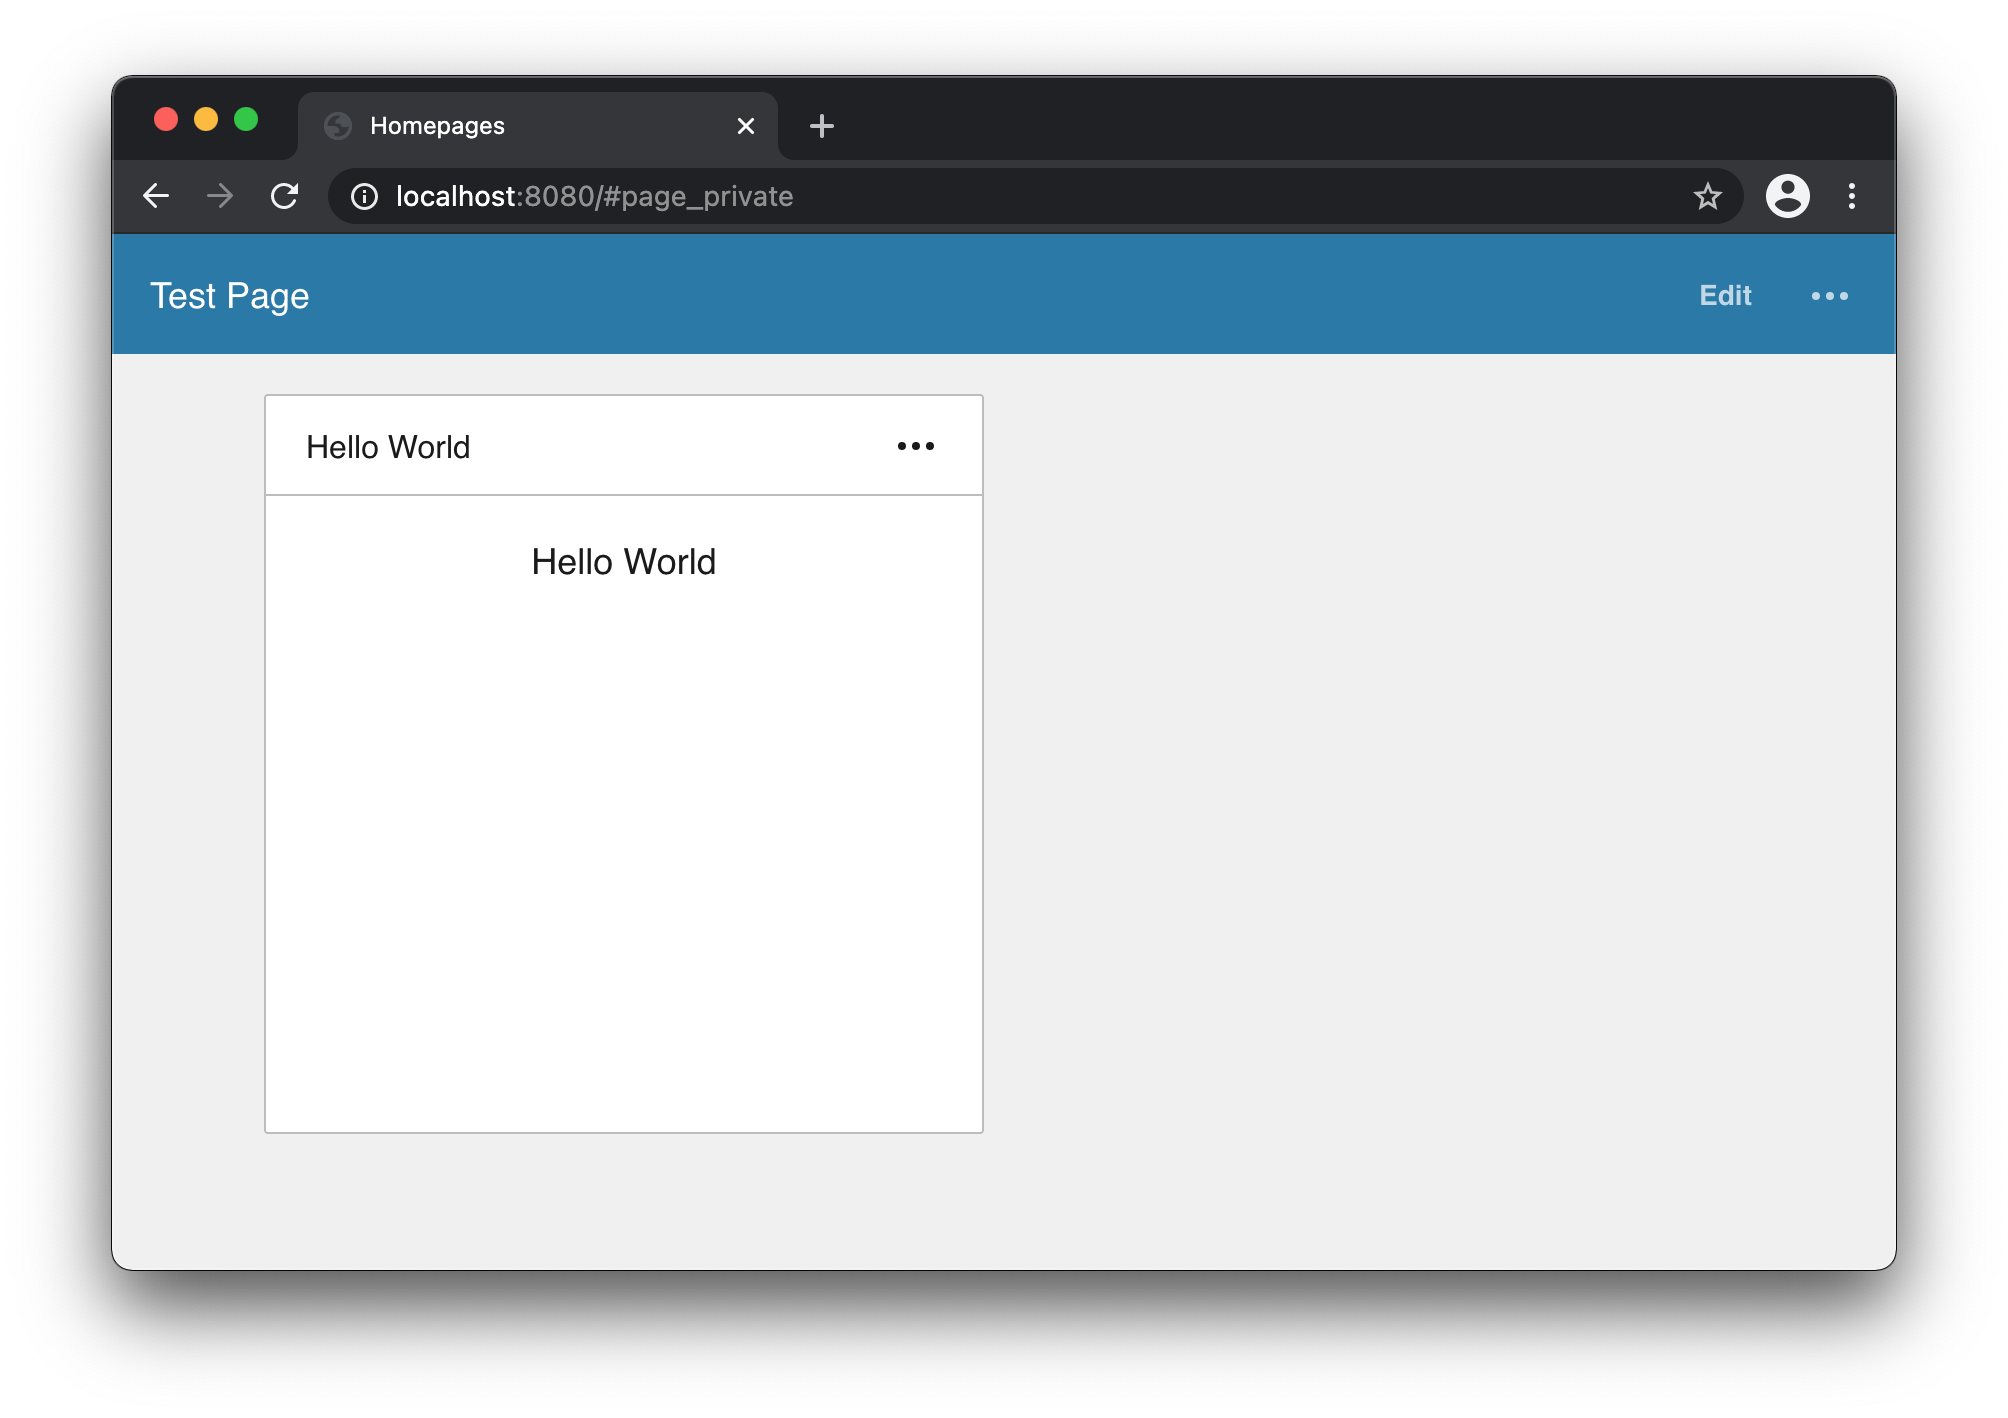
That doesn’t look right. I can see Homepages with the “Hello World” sample widget, but not my “Todo” widget. The issue here is that I haven’t told Homepages to show my widget. The way to do that is by making a final change in index.html:
<body class="no-scroll">
    <!-- Remove/comment this: -->
    <!-- Hello World sample -->
    <!--<lm-app devWidget="infor.sample.helloworld"></lm-app>-->

    <!-- ...and add this: -->
    <lm-app devWidget="sample.todo"></lm-app>
    ...
</body>
Now, if I go back to the browser window: 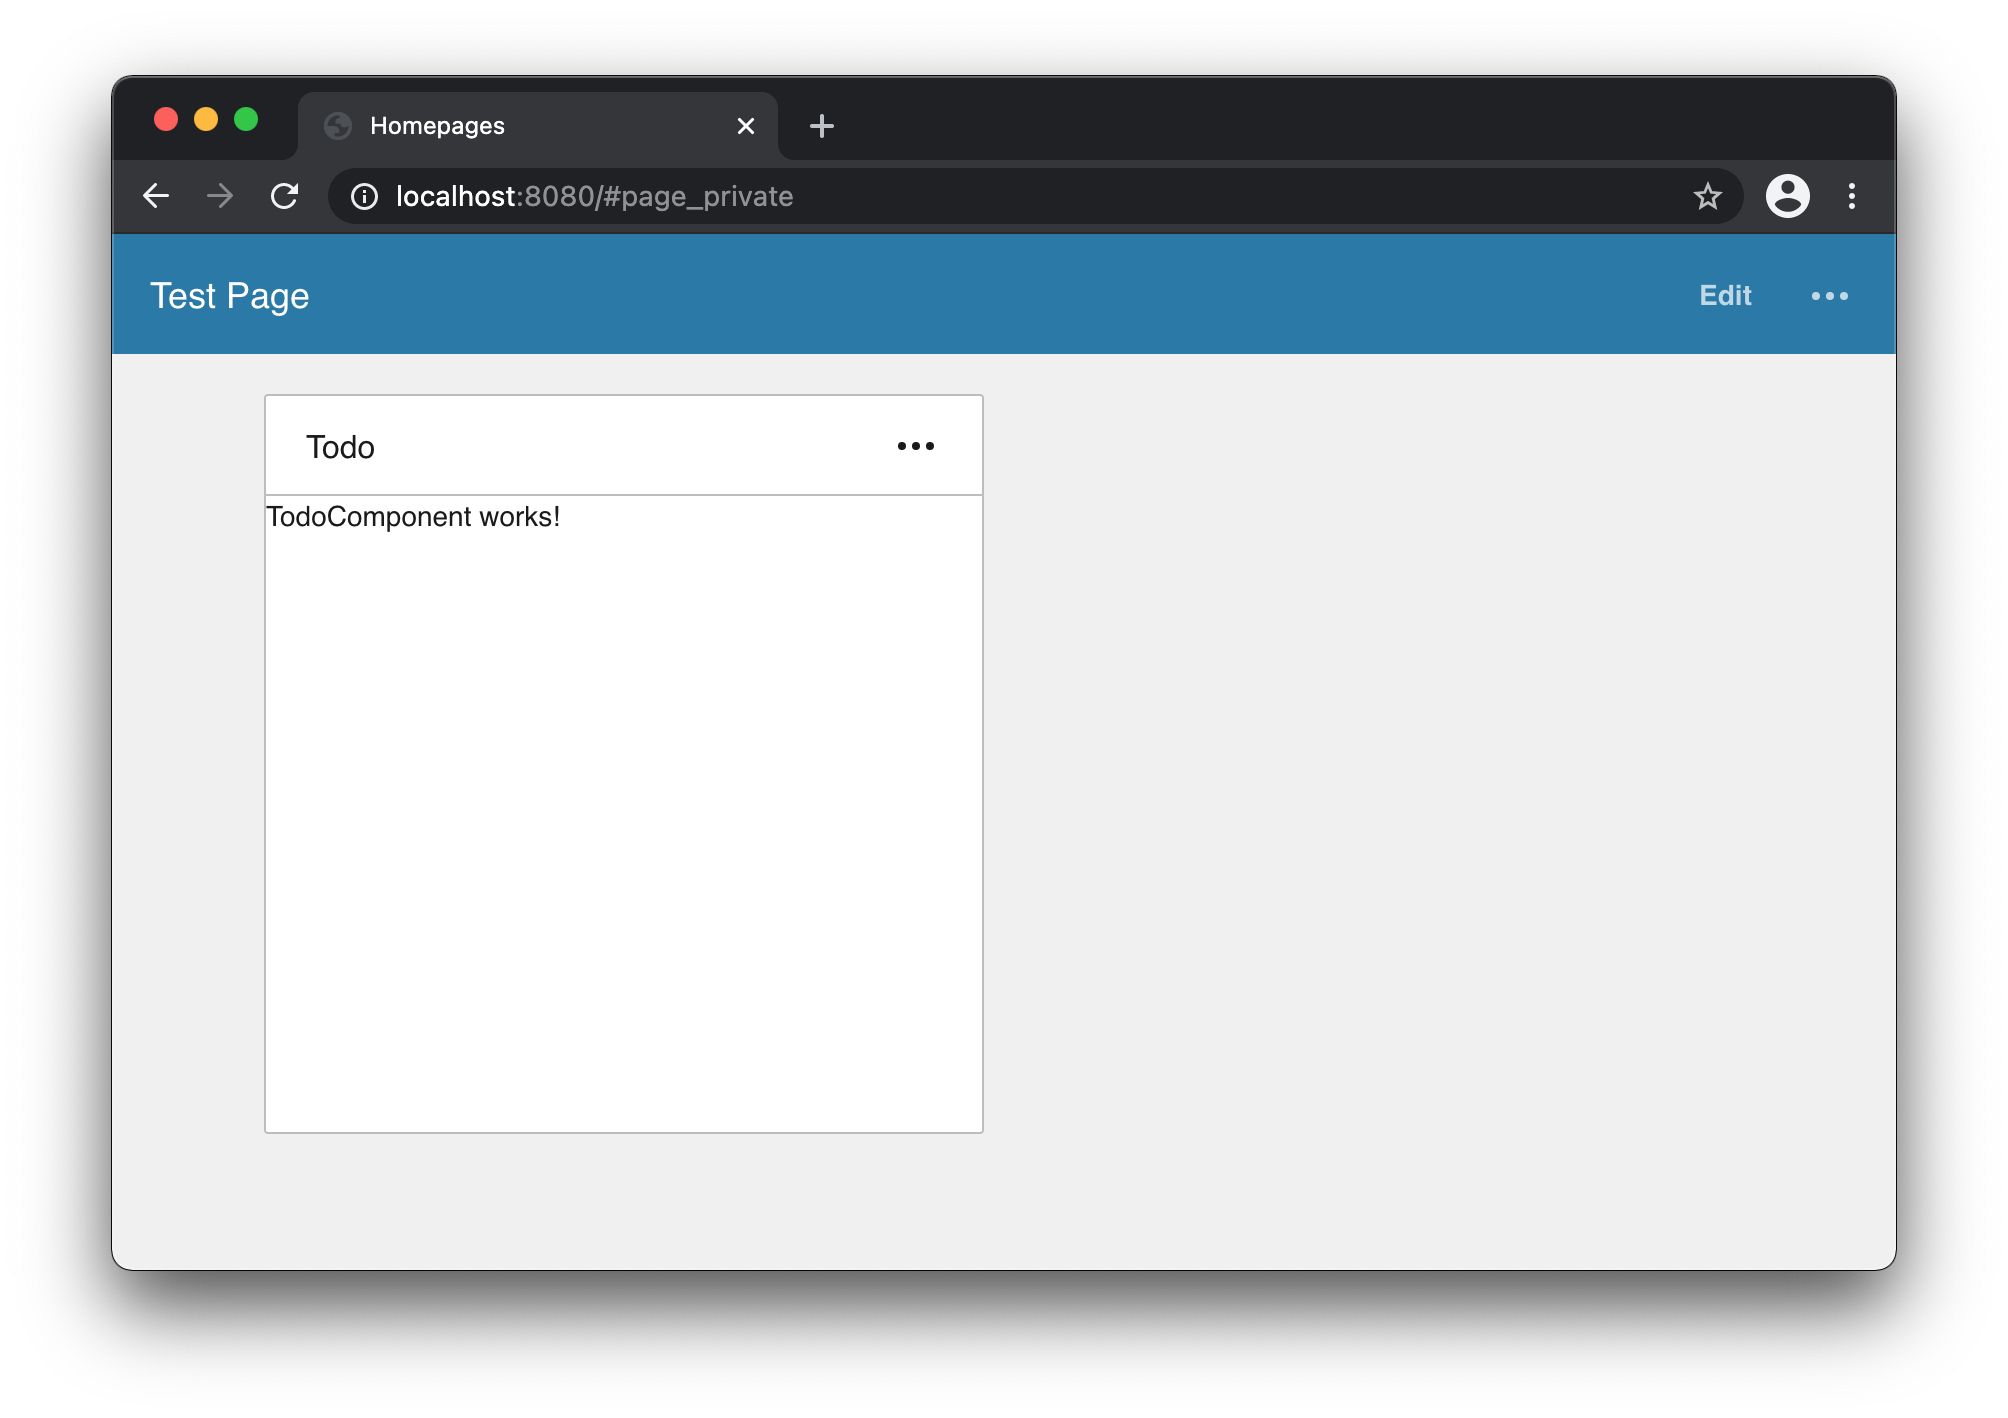 It works! Time to commit the changes:
$ git add ./sample.todo
$ git commit -m "Add Todo Widget"
Adding some content
Now that I know that everything works, I can add some content to the widget. This widget should display a Todo-list using some IDS Components, so first I’ll add some imports to todo.module.ts:
import { CommonModule } from "@angular/common";
import { NgModule } from "@angular/core";
import { FormsModule } from "@angular/forms";
import { SohoComponentsModule } from "@infor/sohoxi-angular";
import { TodoComponent } from "./todo.component";

@NgModule({
    imports: [
        CommonModule,           // <-----
        FormsModule,            // <-----
        SohoComponentsModule,   // <-----
    ],
    declarations: [
        TodoComponent,
    ],
})
export class TodoModule { }
Then I create a new class which will contain the model for a Task in a new file task.ts:
export class Task {
    done: boolean;
    readonly description: string;
    readonly id: number;

    constructor(description: string) {
        this.description = description;
        this.done = false;
        this.id = this.generateId();
    }

    private generateId(): number {
        return 1_000_000_000 + Math.floor(Math.random() * 1_000_000_000);
    }
}
Finally, I add a template to my TodoComponent as well as some placeholder tasks in todo.component.ts:
import { Component } from "@angular/core";
import { Task } from "./task";

@Component({
    template: `
        <div class="lm-padding-md">
            <div *ngFor="let task of tasks" class="field">
                <input soho-checkbox [(ngModel)]="task.done" [id]="task.id">
                <label soho-label [for]="task.id"></label>
            </div>
        </div>
    `,
})
export class TodoComponent {
    tasks: Task[] = [
        new Task("Buy groceries"),
        new Task("Feed dog"),
        new Task("Pick up spouse"),
        new Task("Call friend"),
        new Task("Sleep"),
    ];
}
And here’s the result: 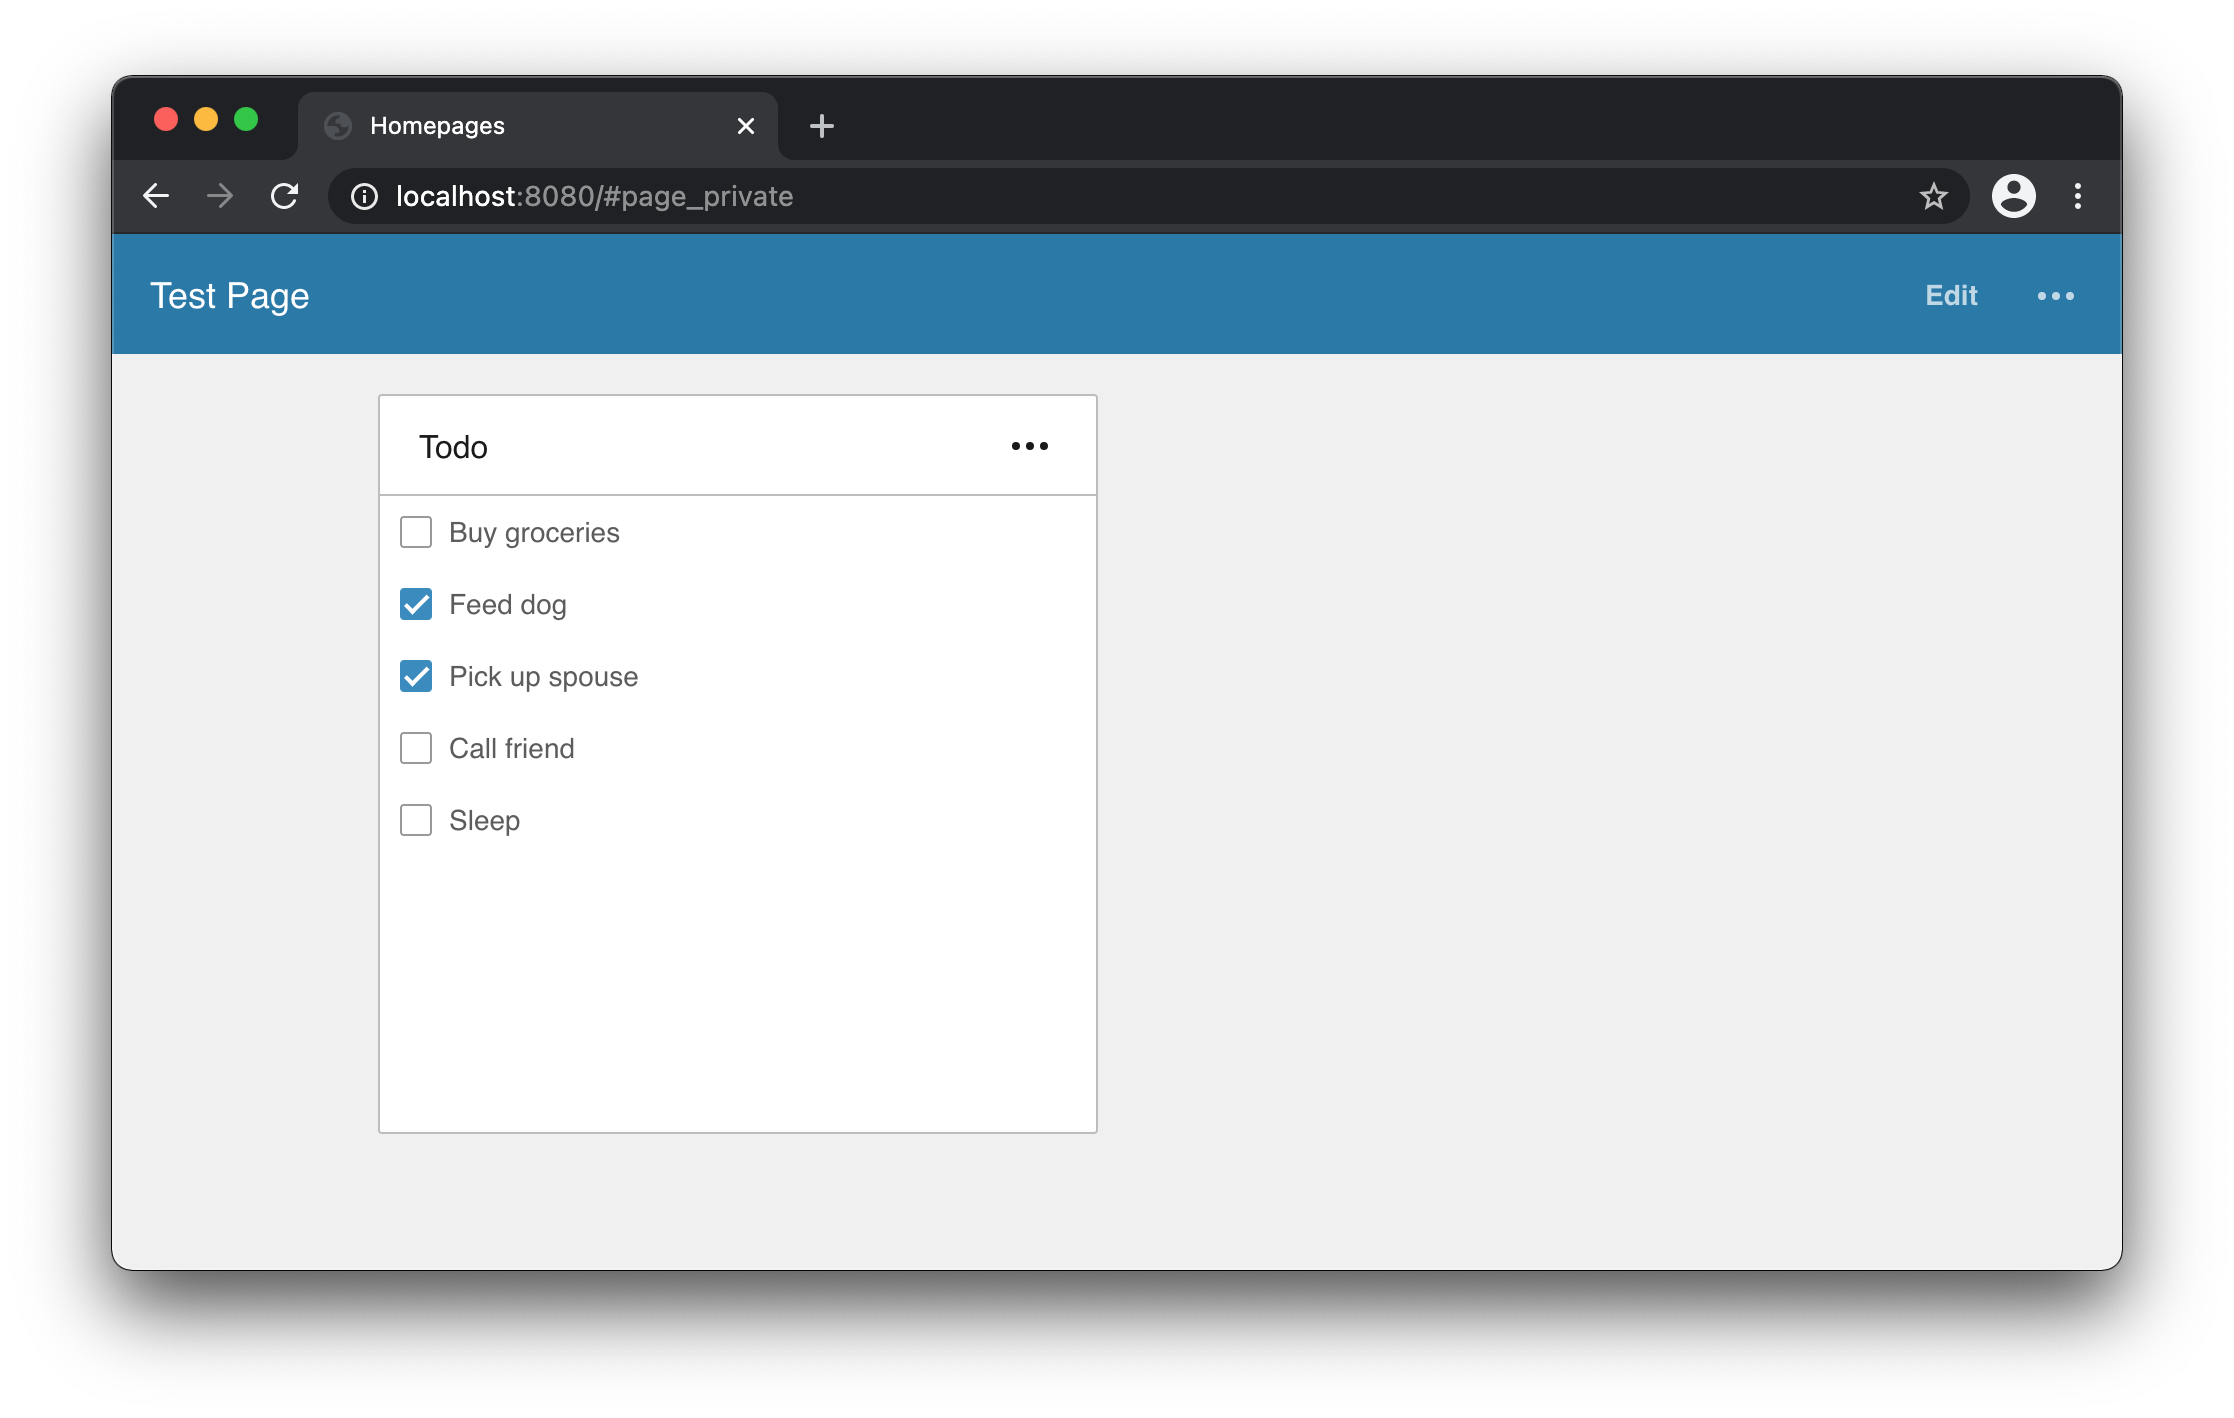
Everything looks okay, and there are no compiler- or linting errors. Time to commit:
$ git add ./sample.todo
$ git commit -m "Visualise tasks in Todo Widget"
There are lots of things we can do to improve this widget. But I’ll leave it as it is for now and move on.
Packing
So now I have a basic widget working. It may not be very useful yet, but I’d still want to try it out outside of my development environment (or perhaps send it off to review).
To do this, I need to pack the widget using the homepages.js script:
$ node ../homepages pack sample.todo
Homepages SDK
=============
Command: pack

Begin: Resolve widget directory...
....
Widget package file location:
~/code/Infor_HomepagesWidgetSDK/Samples/Builds/sample.todo-1.0.20201125-151201.zip
And there we go! A zip file that is ready to be uploaded to Homepages in your environment of choice.
Note: The process for uploading the widget to a cloud environment involves a few extra steps like packing it as a Tenant Widget. More on that in another post.